I've been planning on a post about finding the time to craft for a while and ironically, these past few weeks have been so busy for me that I haven't had time to create a blog post. I love it when life imitates art...
Many of you probably have the same type of responsibilities to juggle that I have. Between work, family, errands, workouts, cooking, cleaning, and (periodically) sleeping, it can feel nearly impossible to find the time to invest in your craft and create some jump-ring filled goodness. So how do you balance all of the things you 'need' to do with the joyful activities that you 'want' to do? Prioritization. Yep, and it's about as fun-filled (but necessary) as it sounds if you want to balance real-life responsibilites with your fun new hobby (ahhh, the joys of being a grown-up).
The first thing you need to do when you find yourself saying things like 'I have no time to do X' is to figure out where your time is currently going and comparing that to where you desire your time to go. I like to use a calendar like Google Calendar and track all of my time usage for a week or two to see where the drain on my 24-hour resource is, but you can also simply use a notebook or a manual datebook if that is easier for you to carry with you and track. Write every section of time that you start and stop every activity you do to see what an average day/week looks like for you. An example day for me may look something like this:
5:00 am - wake up
5:00-5:30 am -put dogs outside/give medicines (0.5 hours)
5:30-6:30 am - work-out (1 hour)
6:30-6:45 am -shower (0.25 hours)
6:45-7:00 am - e-mails (0.25 hours)
7-7:20 am - breakfast/pack lunch (0.25 hours)
7:20-8:00 am - commute (0.75 hours)
8:00 am-12 pm - work (4.0 hours)
12-12:30 pm - lunch (0.5 hours)
12:30-4:30 pm - work (4.0 hours)
4:30-5:00 pm - commute (0.5 hours)
5:00-6:30 pm - workout (1.5 hours)
6:30-7:00 pm - dinner w/hubby (0.5 hours)
7:00-8:00 pm - e-mails/order processing(1 hour)
7:00-7:20 pm - chainmaille e-mails
7:20-7:45 pm - Google Reader review
7:45-8:00 pm - packing newest orders
8:00-8:20 pm - pay bills/check personal e-mails (0.25 hour)
8:20-10:00 pm - chainmaille related projects (crafting/blogging/etc.) (2 hours)
8:20-8:40 pm - work on latest blog post
8:40-10:00 pm - crafting
10 pm-5 am - sleep (7 hours)
WHEW! Now that you can see where your time is going you can try to identify sections of time that could be more efficiently spent to allow you a little more mailling time. And keep in mind the efficiency/time gains do not have to be solely your project/output. Feel free to identify projects that you could delegate to other household members, or at least ask them to pitch in on, to allow you to carve out a little 'you' time. If you spend a large chunck of time preparing meals and cleaning up, maybe you can work out a deal with your significant other and/or kids that if you cook the meal they do the dishes. Or make packing lunches for the next day a nightly family affair to avoid a hectic morning rush. Can your kids lay out their clothes/bookbags for the next day before bedtime? Can your significant other balance the checkbook and pay the bills (at least for a while)? Can you craft while also helping your kids practice their spelling flashcards? Think outside of the box, see what works for your household.
If you commute using public transportation, that may be a great time to catch up on your reading (blogs you follow, craft magazines that you subscribe to, etc.) or, using mobile technology, that can be a great time to set up your day's worth of Twitter updates using an app like TweetDeck or to check/respond to e-mails or order questions. If you drive, do you have any podcasts or audio-books that you've been meaning to catch up on that you could load on a mobile mp3 player and play through your car stereo?
I'm working off the assumption that you do not have a job that allows you to chainmaille while at your desk (although if you do, I'd love to hear about it!). As such, the time you spend at work is probably not going to be greatly under your control from a craft-management standpoint. But keep in mind that effective time management skills in one part of your life (work) can carry over to the other parts of your life as well, so feel free to evaluate how you spend your 40-hours and determine if you could save some energy there as well. HOWEVER, lunch time and breaks can be a wonderful quick-fire time to accomplish crafting objectives. A great article on ideas of how to spend your lunch time creatively can be found here.
At least for me, the biggest time sink I was able to identify in my daily routine was in the evenings after I got home from work and my evening exercise session. I tended to spend time catching up with my hubby (good, productive, and highly encouraged), but I also had a tendancy to sit down to watch "just a little TV' and lose 3 hours of my night (dang you, Netflix). Chainmaille isn't really an activity that is easy to multi-task at, and you certainly need to be looking at the project (not the LCD screen) in order to be successful, so this was very unproductive time. What I've done to try to curb that habit is to actually schedule a TV night once or twice a week (depending on my schedule at work), so that I can give myself that veg-out time to catch up on my favorite shows, but the other nights I designate at least an hour to a chainmaille-related activity. It may not seem like much time each day, but it adds up quickly, especially when compared to the (highly limited) time I chainmailled BEFORE I started charting my time.
Graphing out your time is only the first step in organizing your life to allow for responsibilities as well as hobby time, but it is a very important first step. It's nearly impossible to determine how much time you have available for your craft without first understanding where your time goes. So spend at least a couple days this week tracking how you spent your time. It's one more thing on what is for many of us an already overloaded to-do list, but it has such a huge payout in the end.
Saturday, March 24, 2012
Saturday, March 3, 2012
Pricing Your Work (or, 'That bracelet is HOW much!!???...)
I never set out to make a profit doing chainmaille. I do it because I enjoy it, I find it (paradoxically) relaxing, and I enjoy the feeling of giving someone a gift that I created myself. However, as time has gone on and I've created more pieces, wearing my jewelry to work, out to dinner, etc. I've come to understand that people asking me about my jewelry and asking for me to make them one is not only flattering but is a potential income stream. But it left me wondering, how do you decide how much to sell something you created for? How do you tell your friends and family how much something they like would cost without feeling awkward or undervaluing your work? How do you know what price the market will bear for a piece, especially with the potential competition available both locally and on-line? What is your time worth? Although there are no easy answers to any of these questions, there are ways you can set the price when someone asks you the (highly anticipated) question of "How much would it cost for you to make one for me?"
Unfortunately, there is not one magic way to determine what price you should ask for you handmade item. Although the cost of materials can be very straightforward, and you obviously should set your price to cover materials, other factors in setting a price can be very subjective. Factors such as labor costs, overhead, profit, and wholesale vs. retail pricing can be a little intimidating to someone who's just looking to share their love of a particular craft with the world at a fair price. And the apparent penchant for handmade craft artists to undervalue their work means that pricing your work based on what is already on the market, or worse yet compared to what you find at a discount retailer, can leave you taking a loss on your work and potentially becoming frustrated with the craft overall. It may be a bit of trial and error for you to find out what is appropriate for your situation, but I hope to give you a little guidance to get you started in the right direction.
The general formula for determining the cost of a piece is:
Materials + Labor + Overhead + Profit = Wholesale Cost
Wholesale Costs x 2 = Retail Cost
Probably the first factor people think of in regards to setting a cost is the materials needed to make the item. And that is an important factor. But it is essential that you actually KNOW the cost of your materials and the amount used when evaluating this component. It can be fairly straight-forward in regards to chainmaille, count the number of rings that you need for a piece and determine the per-ring cost from your supply purchase ($2.75 for 100 rings = $0.0275 per ring) and you have the cost of the materials to make the piece. Don't forget to include things like fasteners, beads, beading wire, etc. in the material cost as well. I also think there is a strong argument for not only recouping the cost of the materials that went into the piece, but also the cost to restock your supplies to make a replacement piece. This idea is (in some circles) controversial, but I feel that taking the cost of the materials x 2 is actually an appropriate materials cost equation.
Labor is an important factor in handmade crafts that, for me at least, is the most difficult to determine. You want to be paid a fair amount for your time, expertise, training, etc. but for many hobbyists we are not looking to use our crafts as our main source of income. So how do we decide what our time is worth? If you are looking to make your living solely from your craft, you need to decide how much you need to make to keep a roof over your head and food on your plate, and then based on the time you invest in your crafts on a daily/weekly basis, you can determine what you need to make per hour ($2400 per month in expenses/160 hours per month crafting = $15 per hour for a living wage). But for those of us doing this as a side gig, there is no 'hard and fast rule' for setting your wage. You have to decide what you think your time is worth and try (desperately) not to sell yourself short.
Overhead accounts for the miscellaneous expenses that don't fall under materials or labor. This includes things like tools, office space rental, office supplies, packing materials, etc. This may be one of the easiest portions of cost to account for, although you may have to estimate when you are first starting out. Keep track of all of these expenses for several months while also tracking how much time you spend on your craft, and then divide the expenses by that time and number of months to determine an overhead cost for each item ($450 in expenses/3 months/120 hours = $1.25 overhead per piece). I tend to include things like purchased patterns and extended training classes in my overhead costs as well.
Profit. Every one of us hopes to make a profit on our sold crafts. But profit is not to be confused with the labor costs. What you are 'paying yourself' for your time is NOT profit. Profit is an amount over and above the cost of making the item that you can reinvest back into your craft for new supplies, better tools, a new craft desk, etc. And how much you set as your profit per piece is a personal decision. You may want to start out with a lower profit amount while you build a customer base and then slowly increase that amount as you build a loyal following and determine what the market will bear as a cost.
Wholesale costs vs. retail cost is an issue to consider if you intend to sell your items to retail outlets or boutiques for resale. Wholesale cost would typically be the cost that you would sell your items to these resellers for, and then they in turn will multiply that wholesale cost based on their store policy to set their retail cost for your item. If you do not intend to sell to a resale outlet, this number may only be used by you to set your overall 'direct to customer' retail price. But it is unwise to use the wholesale price as your direct customer price if you can avoid it. After all, you'd be hard pressed to find a resale outlet that will purchase your items for resale if they know that you are selling for the same (wholesale) price directly to customers. Who would come to their store and pay 2 to 3 times as much for your item if they can go directly to you for it? So keep that in mind, if you think you may try to sell to retail outlets in the future. Also, if you sell directly to customers at your wholesale price and then start selling at a retail outlet, suddenly doubling your direct customer costs could (understandably) anger those loyal customers you spent time wooing. Explaining that you doubled your price overnight because XYZ Boutique started selling your stuff will not necessarily make your customers any more understanding of the sudden price hike.
So, to put all this together, here's an example of setting the cost for a handmade piece:
Tammy is making handmade jewelry as a hobby, not for her sole income, so she decides that $10/hour is a fair wage. The necklace she is currently working on takes $6.25 in materials and 1.5 hours to make. She's tracked her expenses for several months and determined her overhead is $1.50 per piece. And she sets her profit at $5 per piece to reinvest in her business. Therefore, the cost for the necklace would be:
(6.25 x 2) + (10 x 1.5) + 1.50 + 5 = $34 wholesale price
34 x 2 = $68 retail price
It's important to note that these cost calculations do not include things like sales tax or other (potential) accounting/tax expenses. Be sure to check with a tax advisor regarding the tax requirements for your state, and include any necessary costs in your pricing calculations.
If you'd like to learn more about setting a price for your handmade craft, there are many wonderful references available on-line and at your local library. A few to get you started include:
Blue Buddha Boutique
The Crafts Report
Inspiri-Art-and-Craft.com
"Sell your jewelry : how to start a jewelry business and make money selling jewelry at boutiques, fairs, trunk shows, Etsy" by Stacie Vander Pol
"How to Start a Home-Based Jewelry Making Business" by Maire Loughran
"Marketing and Selling Your Handmade Jewelry : the Complete Guide to Turning Your Passion Into Profit" by Viki Lareau
And so, there is your quick overview of pricing your work. Happy number crunching and may all your sales end in a profit...
Saturday, February 25, 2012
Tools of the trade (or, What you need to create the magic)
Rings are only half of the equation when it comes to creating chainmaille products, the other thing that you need is the proper tools. But what are those tools, and how do you know which tool is the right one for your particular situation? By far the most important tool(s) in a chainmailler's arsenal (besides a strong back and the ability to swear like a sailor at times) are pliers. Lots and lots of pliers...I have over a dozen pairs of pliers just for chainmaille. Chain nose and bent nose and flat nose, oh my. And each of these pliers has a time when they shine. While I won't list particular brands or suppliers in this article (although I will give credit for images that I use), I feel that a quick overview of the uses of each variety of pliers is important. Each type has a 'best used when' scenario, but ultimately it often comes down to personal preference. And so, without further ado... Welcome to the hardware store...
Some general notes on pliers selection. If you are going to be using your pliers for chainmaille (and why would you be reading this if that's not your plan), you must make sure that they do NOT have teeth. The 'working edge' of the pliers must be smooth, either by manufacture or filed down after you purchase them. Teeth will scratch your rings and create a wonderful cheese-grater like feeling to your jewelry that will not get you repeat customers. In my experience, finding non-toothy pliers at your local hardware store is very difficult, and even some craft store pliers have sported a full set of canines. So look closely before you buy.
Also, everyone's hand shape, size, and strength is different, so you may have to work for a while to find the pliers that fit you best. What is one person's favorite brand may be another's carpel tunnel syndrome factory. Assuming you take (highly recommended) stretch breaks while working, your pliers should not cause your hands to cramp or become painful or swollen. If you have problems, they are probably not the pliers for you. And don't let price be your guide, there are some very nice expensive pliers out there, but that doesn't mean they are guaranteed to fit you.
Flat Nose Pliers
These are probably your most commonly used pliers type in chainmaille. The wider, flat working surface allows for a great ability to grip the rings securely while also minimizing the chance of warping the rings. Whether you are working with larger, thick-gauge rings or smaller rings, these pliers will quickly become your best friend. However, the other types of pliers still have their times to shine!
Round Nose Pliers
These types of pliers feature a working surface that is completely round. As such, they are not really used for the standard chainmaille activity of opening and closing jump rings. These pliers are actually used for creating loops (such as would be used to attach beads to your chainmaille) or if you want to create a (very) small number of rings yourself. If you are truly interested in creating your own rings, you'll probably upgrade to a power drill and a host of other tools. But these types of pliers are handy to have around if you decide you want to up the bling-factor of your jewelry by including beads or custom-made finishing touches.
Chain Nose Pliers
Chain nose pliers are slightly similar to round-nose pliers in that they have a more rounded working surface and a pointed nose. However, they have a flat interior surface that does allow for gripping the rings while you work with them. These pliers are not really great for closing larger rings, but they are really handy if you have a tight working space that you cannot grip the rings with a flat-nose pair of pliers in each hand. I will often use a single chain nose pliers with a flat nose pliers (or a bent nose) in my opposing hand when working with a very tight weave.
Bent Nose Pliers
Take a chain nose pliers and bend the nose to a near-90 degree angle and you've got the traditional bent nose pliers. These pliers, much like chain nose, have some difficulties closing rings without warping, but they have been a sanity-saver for me when working with micro-maille (very small jump rings) because the bent surface lets me grip the small rings much like a flat nose pliers without the large amount of surface area that is present in a flat nose pair. The larger area of a flat nose, for me, often obscured the rings to the point it was difficult to tell if the ring closed completely.
Other Useful Tool-Like Items
While pliers are probably your most useful and important tools for chainmaille, there are certainly some other things to have in your maille toolbox that can make your projects quicker, more durable, and/or less aggravating.
Jump Ring Tool
I have never used a jump ring tool, so I cannot give a personal review of the usefulness of this tool. However, I have heard some chainmaillers who love to have one of these handy, saying it makes working with their rings quicker and more comfortable. This little tool is worn on your hand much like a jewelry ring and the slots are used to replace one of your pairs of pliers when opening and closing jump rings. Myself, I like the primal feeling of dual-wielding pliers, but if you find juggling multiple pliers difficult, you may want to try this and see if you like it.
Bead Mat
I LOVE these mats! They were (as the name implies) created for beaders to help keep their beads from rolling away. But they work fantastic for chainmaille as well, keeping your rings from sliding about and making it very easy to 'scoop' closed rings onto an open ring straight off the mat. The felt-like surface keeps your rings steady without getting fuzzy or clinging to the rings. You can buy these at pretty much any craft store, probably in the beading aisle or near the beading tools.
Tool Magic
If you asked me what was probably the single most fantastic product that made my chainmaille life easier, it would be a difficult tos-up between my bead mat and Tool Magic. This is a plastic-like paste that you dip the tips of your pliers in to coat the working surface. After it dries, it not only makes you far less likely to scratch the surface of your rings, but also makes the rings easier to grip and makes the dreaded 'ring launch' much less likely to happen. It can be difficult to find in some craft stores, but it is well worth the hunt. It is also widely available from on-line jewelry supply sources. Depending on how much you use your pliers and how 'aggressive' you work, you will have to re-dip your tools as the Tool Magic gets 'grungy', but the small jar will last for many, many dips.
Rock Tumbler
This piece of power equipment is useful for shining up your rings and final creations. By placing your rings in the tumbler with either sand or a fine-grain steel shot you can polish off any rough edges and create a like-new shine. However, be careful if tumbling colored rings or jewelry including beads or crystals, as the tumbling may scratch the color coating or break the embellishments.
Although the tools of chainmaille may seem mundane, they are an important factor in your creative process that must not be overlooked. If you want to be sure that you enjoy chainmaille for years and years injury-free, finding tools that are useful and comfortable for your hands is essential. Do not fear the hardware, trial and error to find your favorite brand(s) will pay off in the long run. And trust me, you can never have too many pliers...
 |
| Image from www.wildaboutbeads.com |
Also, everyone's hand shape, size, and strength is different, so you may have to work for a while to find the pliers that fit you best. What is one person's favorite brand may be another's carpel tunnel syndrome factory. Assuming you take (highly recommended) stretch breaks while working, your pliers should not cause your hands to cramp or become painful or swollen. If you have problems, they are probably not the pliers for you. And don't let price be your guide, there are some very nice expensive pliers out there, but that doesn't mean they are guaranteed to fit you.
Flat Nose Pliers
 |
| Image from www.objectsandelements.com |
Round Nose Pliers
 |
| Image from www.objectsandelements.com |
These types of pliers feature a working surface that is completely round. As such, they are not really used for the standard chainmaille activity of opening and closing jump rings. These pliers are actually used for creating loops (such as would be used to attach beads to your chainmaille) or if you want to create a (very) small number of rings yourself. If you are truly interested in creating your own rings, you'll probably upgrade to a power drill and a host of other tools. But these types of pliers are handy to have around if you decide you want to up the bling-factor of your jewelry by including beads or custom-made finishing touches.
Chain Nose Pliers
 |
| Image from www.store.ornamentea.com |
Bent Nose Pliers
 |
| Image from www.completeheli.com |
Other Useful Tool-Like Items
While pliers are probably your most useful and important tools for chainmaille, there are certainly some other things to have in your maille toolbox that can make your projects quicker, more durable, and/or less aggravating.
Jump Ring Tool
 |
| Image from www.thecrystalphoenix.com |
Bead Mat
 |
| Image from www.bojanglebeads.co.uk |
Tool Magic
 |
| Image from www.faerynicethings.com |
Rock Tumbler
 |
| Image from www.geology.com |
This piece of power equipment is useful for shining up your rings and final creations. By placing your rings in the tumbler with either sand or a fine-grain steel shot you can polish off any rough edges and create a like-new shine. However, be careful if tumbling colored rings or jewelry including beads or crystals, as the tumbling may scratch the color coating or break the embellishments.
Although the tools of chainmaille may seem mundane, they are an important factor in your creative process that must not be overlooked. If you want to be sure that you enjoy chainmaille for years and years injury-free, finding tools that are useful and comfortable for your hands is essential. Do not fear the hardware, trial and error to find your favorite brand(s) will pay off in the long run. And trust me, you can never have too many pliers...
Friday, February 17, 2012
OOOOHHHH, Shiny! (or, fun with the various metals)
There are numerous metals (and other materials) available to work with in chainmaille, and due to budget constraints I have not had the pleasure of working with all of them. However, information on the pros and cons of each material is widely available through chainmaille suppliers, artists, and hobbyists. Materials can vary greatly in price, suitability, strength, and appropriateness for any given project, so it is important to understand your goals for a particular chainmaille piece when deciding on the materials you will use to construct it. Also, material aesthetics and characteristics can vary between suppliers, bright aluminum from one supplier may have a greater (or lesser) amount of shine than the 'same' material from another provider or one suppliers alloy may be softer than another's. It's up to you to decide which product appeals to you most. But, to get you started, here is a quick overview of some of the more common chainmaille metals and materials...
Base Metals
Regular Aluminum - This metal alloy is not suitable for most jewelry applications, but is used in some industrial applications or for anodizing (coloring). This metal has a habit of turning your hands, clothing, and anything else it comes in contact with black (1). Most of the suppliers that I use for my chainmaille jewelry do not offer this metal. Others, like The Ring Lord do offer these rings but they state that they are very 'dirty' to work with.
Bright Aluminum - This alloy of aluminum is very light and shiny, with little to no black 'rub off' as is found in regular aluminum. It is also inexpensive, making it a great metal for budget-conscious yet beautiful jewelry creations as well as your general chainmaille needs. This metal is easy to manipulate but this also makes it a bit lacking in the durability department when compared to some of the stiffer metals (2). Ultimately, this is a great beginner metal for some beautiful creations if you can't afford silver.
Anodized Aluminum - In layman's terms this is 'colored aluminum'. The colored rings are created by running an electrical current through aluminum rings and then dyeing them (3), creating a colored outer coating. These are the least expensive of the colored metal rings generally available on the market (3). The colors can be vibrant, but they can also vary across batches and between batches and the color can also be scratched, flake off, or fade with wear (3, 4). Depending on the supplier, the rings may be dyed before or after they are cut, so make sure you check as rings that are colored after they are cut have colored ends as well and (in my experience) the closures are less evident.
Copper - Copper is a lovely reddish colored metal that is fairly easy to work with and relatively inexpensive (3). However, it's a fairly weak (read: easily warped) metal and tends to tarnish fairly quickly. Copper pieces require frequent cleaning with lemon juice and/or storage in fairly air-tight containers to maintain their shine. Or, you can leave it tarnished and have a unique patina on each piece that some people find very attractive.
Enameled Copper - These rings are copper which has had a layer of color added to the surface. The colors can be very vivid, but the process of coating the wire makes the copper even softer than it was previously (3). This makes the rings exceptionally prone to warping if mishandled. The rings are often cut after the color is applied, leaving exposed copper ends that require focus to align in the finished piece. Some people also have a reaction to copper that can cause their skin to turn green if they come in contact with the metal (2). If handled properly, however, these rings can give you access to some unique and outstanding color variations.
Brass - Also known as Jewelry Brass, this is a wonderful golden-colored metal that can give your project a beautiful shine and weight. It does contain copper, so people that react to copper (as mentioned above) may also react to brass and the rings may develop a patina quickly (2). Any jewelry cleaner that states it's safe for brass can be used on these rings (but other metals may react to the cleaner, so do not use brass cleaner if the piece contains other materials). Although this is a harder metal than copper or aluminum, it is still fairly easy to work with so that beginners can benefit from its golden hues.
Bronze - This metal appears very similar to copper in color, but is harder and tends to be more expensive (2). It does contain copper, so people that react to copper (as mentioned above) may also react to brass and the rings may develop a patina quickly (2). Any cleaner that is safe for brass or copper can be used to remove the tarnish if desired, but the same caveat of mixing metals applies here as with brass. At the thicker gauges this metal may be a bit hard to work with, but it is very durable, often making it worth the effort.
Stainless Steel - The most durable of the base metals, with a nice weight and dark silvery color (2). However, that durability comes at an (economic and spiritual) price. This metal is can be extremely hard to work with, especially at the thicker gauges, and will probably reduce you to either tears or swearing when you first start dealing with it. Be aware that this metal contains nickel, which may cause an allergic reaction in some people (2). But unlike bronze and copper, this metal does not tarnish or rust (5).
Rubber/Silicone O-rings - These rings can be made of a variety of materials, including silicone, neoprene, and EPDM (3). They tend to be inexpensive and can give your chainmaille creation a nice dose of color and stretch. The amount of stretch and the long-term durability of the rings varies by manufacturer and material, so some trial and error may be necessary to find what works best for your individual projects. I would suggest looking for latex-free rings to avoid any potential allergy concerns.
Precious Metals
Sterling Silver - Sterling silver is formed by the addition of copper to silver, creating a stronger metal than silver alone (3). It is a beautiful, shiny, weighty metal, but it is also very pricey currently. That may change if the price of silver declines, but for the foreseeable future this is a very expensive metal to work with. People who react to copper may react to sterling silver, so it is important to keep metal sensitivity in mind even for the precious metals.
Argentium Silver - This is an alloy of silver containing 92.5% fine silver. This metal is harder than standard sterling silver while also being tarnish resistant (6), making it a very popular low-maintenance precious metal for chainmaille jewelry.
Gold-fill - These rings are made by putting a layer of gold over another base metal, giving extra strength to the ring while providing the shine and prestige of gold. The gold layer is thicker than gold plate, so well made rings should not have flaking issues (3). But these rings can be very expensive, especially with the price of gold being fairly high currently. Allergies are generally not a problem with this metal, but some people that are highly sensitive to metals may still have a reaction. I myself react to gold-fill if I use it for earring wires. The only metals I can successfully use on myself for earring wires are niobium and (assumably) titanium, which are discussed next.
The process of anodizing does not drastically change the characteristics of the metal in niobium or titanium like it does for copper, so for brevity the anodized and unanodized versions of these metals are combined.
Niobium/Anodized Niobium - Niobium is a dull gray in its natural state, but the application of various voltages causes a plethora of beautiful and subtle color variations (3). This metal tends to be hypoallergenic and doesn't tarnish, as well as being one of the strongest available colored metals (3). However, it is very expensive, making it a risky choice for a beginner who may mar a lot of costly rings while perfecting their technique.
Titanium/Anodized Titanium - Like niobium, titanium is anodized by the application of electricity. The colors tend to be more muted than what is found in aluminum or niobium and can vary greatly from batch to batch (3) but this metal is as close to truly hypo-allergenic as you can often get. It is also VERY expensive, so although it is fairly easy to work with a beginner should think twice before using this metal to avoid a huge cash outflow.
This article only touches on the various materials that are available for your chainmaille experience. Rings made of glass, crystal, gemstones, wood, and other materials can be found on-line and at your local craft store. Don't be afraid to experiment with different materials to change the look of a piece and give it an individual style that is suited to you and your customers. For me, half of the joy I get from chainmaille is from the finished piece, the rest comes from the process of developing an idea and experimenting with the rings and materials that give it the personality that I envision. Take the first step on your metal-experience journey, and find out what elements speak to you...
References
1. http://theringlord.com/cart/shopdisplayproducts.asp?id=15&cat=Aluminum+Jump+Rings
2. http://www.bluebuddhaboutique.com/b3/faq/metals/difference-between-base-metals
3. Mojica, Rebeca. 2010. Chained: Create Gorgeous Chain Mail Jewelry One Ring at a Time. North Light Books, Cincinnati Ohio.
4. http://theringlord.com/cart/shopdisplayproducts.asp?id=174&cat=Anodized+Aluminum+ Jump+Rings+12g+to+14g
5. http://theringlord.com/cart/shopdisplayproducts.asp?id=29&cat=Machine+Cut+Stainless +Steel+Jump+Rings
6. http://www.jewelrybysueonline.com/faq/frequently-asked-questions.html
Tuesday, February 7, 2012
Chainmaille suppliers/references (or, Where do you find those things?)
I've had a lot of people who aren't familiar with chainmaille (and even a few who are) ask me 'Where do you even find that stuff?' So I thought it might be helpful to put together a list of some of the more common and/or my favorite sources for patterns, materials, tools, inspiration, etc. This is by no means an exhaustive list (I'm not quite that obsessed yet), so feel free to drop me a line if you have another source that you like that I haven't listed here. I'm always looking for new suppliers to feed the addiction!
Rings/Scales
You can't make chainmaille without a steady supply of jump rings. And in my experience local hobby stores just don't seem to carry the selection/quantity that most chainmaillers would need. A paltry bag of 50 16g jumprings will not cut it for any of my projects short of maybe a zipper extension. And I do not have the patience or desire to make my own rings (if you do, more power to you). As such, I get most of my jumprings from on-line sources.
My favorite source for jewelry rings is by far Blue Buddha Boutique (B3). They have a wide selection of ring sizes, both in diameters and gauge, as well as almost any metal you could wish to work in. Their bright aluminum is so shiny that sometimes I wonder if they slipped me sterling silver instead! They anodize their niobium in-house and have a great variety of colors available. They are located locally (to me) in Chicago and all of their anodized aluminum is made in the USA! They also supply me with the small anodized scales that I use for my scalemaille earrings.
Another good bulk-ring source on-line is The Ring Lord. They sell their rings by weight, not quantity, but they give an estimate of how many rings per ounce each size/gauge gives you. They have a nice variety of metals and sizes, and I have used their aluminum rings in many patterns. Make sure you pay attention to the type of cutting used on the rings you buy, they offer pinch-cut and saw-cut. Their prices are cheaper than B3, but I don't find their aluminum as shiny, so I typically use them in patterns where the rings are not as visible (such as my scalemaille dicebags) or when I am testing out a new weave that I don't plan on selling the tester item. Ring Lord is where I get the larger aluminum scales that I use for my dicebags as well as the rubber o-rings that I used in a couple dicebags and that my friend Kathy uses for her strechy bracelets.
There are many other chainmaille ring suppliers available that I have not (yet) had a chance to use, but are worth looking into. C & T Designs has a nice selection of square/flat jump rings in a variety of materials if you want to give your project a unique look. Metal Designz has a nice variety of rings as well offering a bulk-buy discount. Fire Mountain Gems is more well-known for their crystals and beads, but they have a nice selection of jumprings in a variety of sizes, materials, and colors as well. There are also craftspeople who make jumprings for purchase on Etsy, search for jump rings or chainmail rings to see what you can find.
Patterns and Classes
There are 2 main categories of pattern sources available: books with multiple patterns and single-pattern sources. I'm a huge fan of books myself, as I often don't know exactly what type of project I want to do next to expand my maille horizons and you can often get 20+ patterns for around $20, but the single-pattern sources are handy if you are looking for something specific or had someone ask if you could make Project X. There are also several jewelry magazines that feature chainmaille patterns fairly regularly, including Step-by-Step Wire Jewelry, Bead Style Magazine, and Bead and Button Magazine.
For books I find it easiest to go to my local library and/or bookstore and browse their selection of jewelry-making books. Don't limit yourself to only books with chainmaille listed on the cover, I've found many chainmaille-based patterns in books focused on beading or wire-work jewelry. What I will often do is look through the books, making note of any (such as "Chained" by Rebeca Mojica, "Classic Chain Mail Jewelry" by Sue Ripsch, or "Link It" by Susan Thomas) that had patterns I liked or gave me ideas and I will then search for them to purchase. This allows me to avoid buying a book that doesn't have what I am looking for and/or being disappointed with an on-line book purchase that only has a few patterns I like.
For single-pattern sources there are numerous potential suppliers. Most on-line companies that supply rings also have patterns available for purchase. Local crafting stores will also periodically have chainmaille artists come in and teach classes, and these teachers will often have copies of their patterns available for sale. M.A.I.L also has a very active community that posts patterns and ideas on a fairly regular basis. And there are a surprising amount of videos available (although the quality and/or instruction varies greatly) to be found by a search on YouTube. Conferences such as the Bead and Button Show will also often have seminars and classes you can take to learn new patterns or perfect your technique. Search for the various craft expos in your area to see what is available in your region (or come to Milwaukee, WI in June for the beading show to end all shows!).
Tools
The proper tools are essential to a successful chainmaille project. The variety of tools that you collect will be based on your personal preference and how 'aggressive' you are (aka, how often you break/wear out your pliers). Where you get your tools can be as simple as your local hardware store, purchasing at a local craft store, or from an on-line ring/chainmaille supply dealer. The most important thing to remember is that the tools you use MUST be comfortable for you to use for an extended period of time and the pliers cannot have teeth or ridges that will scratch your rings. I'll go into more detail on what to look for in your tools in a future post, but for now be confident that you can spend as little as $5 on a pair of pliers at the hardware store or you can spend over $30 for some very nice pliers on-line. I have several different pairs that I tend to alternate between based on the project, and all of mine have been purchased from stores locally.
Beads/Embellishments/Finishing Touches
Your jewelry can embody the simple elegance of just jumprings or you can embellish with the riot of colors, finishes, and textures available from adding beads and charms to your creations. How much you embellish is a matter of personal preference (and, in my case, space constraints). And much like tools, you can find many of your desired finishing touches at local craft stores or by browsing your local craft fair. I've seen some fantastic lampwork beads at my local flea markets and consignment shops, if you take the time to look for them. But, as many people like to shop from the comfort of their home, here are some examples of suppliers for you to help get your glimmer on...
Rio Grand Jewelry Supplies
C-Koop Beads
Saki Silver
Fire Mountain Gems
Blue Buddha Boutique
The list of suppliers for the various 'tools of the trade' for chainmaille creations is changing on a daily basis as new suppliers join the market, new patterns are created, and your local shopping center adds a small beading boutique store. Be sure to check you local craft fairs to find that next great supplier, and feel free to drop me a line with any suppliers you think I should check in to. I'm always looking for more jump-rings to add to my collection...
Tuesday, January 3, 2012
Book Review: "Chained" by Rebeca Mojica (or, an obsession was born...)
Other than the few chainmaille/scalemaille pieces that I had tried at GenCon, I started my chainmaille adventure with a sad lack of available patterns. Although chainmaille has been around for centuries, available patterns for jewelry can be a little tricky to come by. Especially since I have been trying to minimize the use of additional accessories such as beads, crystals, and wire. Right now, with a few exceptions, I am interested in seeing how much you can do with just the various metals and colors available in jumprings. Jumprings give the jewelry an intricate feel and give it a simple elegance I really enjoy. Plus, I have enough trouble keeping all my rings straight without adding bead organization to my list of things I have to find the time and space for.
So it was a thrill when I found the book "Chained" by Rebeca Mojica at a local craft store. Rebeca is the owner/founder of Blue Buddha Boutique (http://www.bluebuddhaboutique.com) in Chicago, IL. She is also an accomplished chainmaille artist with her own line of chainmaille jewelry and a chainmaille instructor. Although I have not had the pleasure of taking one of her classes (yet, hoping to change that in 2012), I can honestly say that the rings and supplies I have purchased from Blue Buddha are fantastic and her book changed the way I think about chainmaille.

If you are at all interested in chainmaille jewelry, I don't know how you can NOT be caught simply on the cover of this book. Even though it shows only 2 of the 20+ patterns outlined in the book (the Japanese Cross Pendant and a Coiled Japanese Lace Bracelet), it succeeds in showing the variety of colors, sizes, shapes, and textures available in chainmaille. The book also has a nice 'heft' to it that makes you feel like you are getting your money's worth. The print quality is strong, although I have to admit that after months of opening the book and looking at patterns, the binding is starting to feel a little loose. I think this book would be a great candidate for spiral-binding allowing people to have it open to a specific page for extended periods of time without trying to weight the corners down to keep the book from slapping shut. The table of contents is clear and easy to understand, you quickly understand how the book is organized and what it can offer to you. The pictures of each finished project, as well as the instructions, or full-color and glossy without overwhelming the (all important) text instructions.
This book is a perfect 'beginning mailler' book, but it also has a lot to offer those who have been launching rings across the room for years. The first section of the book outlines a brief history of chainmaille (with pictures of chainmaille armor that exhaust me just looking at the density of the rings), as well as discussing the various characteristics of the most common jumpring materials, care and cleaning of completed pieces, and the all important tool discussion. This book is where I learned about the wonderful product known as 'Tool Magic'. Since I've started using this product on my pliers, I have lost far fewer rings to the infamous 'slingshot' effect (you know, when you lose your grip on the ring and hear it ricochet off the wall across the room?). There is also a clear in-depth discussion of the appropriate ways to open and close jump rings and how to salvage warped rings (what Rebeca calls the chicken dance technique). All of these are invaluable tips for a beginning mailler, but even an experienced jewelry creator can benefit from Rebeca's discussion of choosing the appropriate clasps and embellishments for your pieces and fantastic finishing touches to give your jewelry that stand-out quality necessary if you are looking to sell you pieces (or even are just a glutton for compliments like me).
The patterns in the book are divided into 4 main families (Japanese weave, Byzantine weave, Helm weave, and Rebeca's coiled mail designs), and then within each of these weaves there are patterns ranging from beginner level to expert. Each pattern is rated by difficulty (which is fantastic, and in my experience the ratings are very accurate), but each pattern also has an estimated time committment listed. This allows you to determine approximatly how long the project will take you to complete (from under an hour to epic-level projects that take 6 or more hours). And many of the patterns also have variations listed (such as how to make the earring pattern into a bracelet or the necklace into a multi-strand cuff bracelet). The pictures are clear and the directions are easy to understand. Having made most of the items listed in the book (I haven't experimented with the coiled patterns yet), I have rarely had any difficulty even if it was the first time I was making a particular weave. The directions for the Byzantine chain were the clearest I have seen in quite some time.
The one characteristic of the book that may cause some difficulty for maillers, especially if you chose to not use Blue Buddha as your ring supplier, is Rebeca's shorthand for ring sizes/gauges. She doesn't use the more standard '5/16" 18-gauge' description, but has developed her own ring classification using an alpha-numeric system that describes rings with terms such as 'D20'. The letter indicates the inner diameter of the ring, while the numbers indicate the gauge. Blue Buddha uses this alpha-numeric system on their website, but if you use other ring suppliers you will have to convert the descriptions to determine what rings you need. This can be time-consuming if you are looking to order supplies for a variety of projects. However, this naming convention has saved me a ton of space on my ring container labels...
As you can imagine, in any book that involves lists of numbers and ring sizes, there are some mistakes/errata in the book. However, as errata are discovered Rebeca lists them on the supply page for the book on Blue Buddha's website ('Chained' errata and updates) along with the correction. I simply went through my book, compared the identified errata, and wrote the corrections in the appropriate place. If you notice errors while you are doing a project, you can e-mail or call Rebeca or Blue Buddha and inform them, their contact information is easily obtainable in the book or on the website (which is refreshing).
Overall, this book would be a great gift to any accomplished or aspiring chainmaille artist to help them expand their horizons, develop a full understanding of a variety of weaves, and experiment with variations on classic chainmaille techniques. It's probably available at your local book store, but you can also check out Blue Buddha's website to purchase a copy. I've also seen it available as an e-book on the Barnes and Nobel Nook Bookstore. Pick it up where you will, but you can't have my copy...
Friday, December 2, 2011
In the Beginning...(or, How I started mailling)
I'm enough of a fantasy/sci-fi nerd that I had heard of chainmaille and scalemaille before (in the context of 'woot, my level 14 paladin just found new scalemaille pants!), but I'd never dreamed of doing anything like it myself. The few pieces of armor I'd seen were INTENSE, thousands upon thousands of rings each woven into the pattern by hand, hundreds of hours invested into a piece of clothing that weighed a ton and would succeed in making you the coolest person at the Ren Faire but the weirdest person on your block. Days at a table with a pair of pliers and a magnifying glass? Yeah, sounds like a blast (insert sarcastic tone and eye roll hear). I blame my friend Kathy, a local craft store, a dedicated chainmaille artist, and a wonderful annual trip to an event called GenCon for changing that attitude and launching my addiction to tiny jump rings, multiple pairs of pliers, and desk lamps with built in magnifying glasses...
My husband and I, along with a group of friends, have traveled to GenCon every year for quite some time now. If you are at all into gaming (card games, board games, computer games, role-playing games, console games, etc.), you may have heard of GenCon. It is THE place to be if you want to experience 24-hours straight of gaming goodness while also allowing the release of that inner nerd we all have buried deep inside us. They have discussion panels, thousands of different games, hundreds of vendors, and a nice variety of crafting classes. Many of these are of the 'build your own foam weapon or leather breastplate' variety, but several years ago Kathy decided to take a class focused on making a chainmaille dicebag. Every good gaming nerd must have a trusty dicebag to keep those 3-sided, 6-sided, 8-sided, etc., etc., etc., dice in, after all. Eventually Kathy had created several dicebags as well as a lanyard to wear her GenCon badge in style. I loved what she had done, so the next year I decided to take a class as well, but (being a glutton for punishment and just a smidge competitive) I decided to 'take it up a notch'. Chainmaille dicebag (pffft), I decided to go straight to scalemaille.

Scalemaille could be considered the angry big brother of chainmaille. You don't just weave the rings, but you also attach metal scales to the rings themselves. My bag wasn't pretty (being that it was all in unanodized (plain) aluminum), but to this day it gets many oohhhs and ahhhs from people when I place it on the table. Plus, I figure it doubles as a weapon since you could really leave a mark if you decided to wack someone with it! Making this bag involved many hours of time (and more than a little inappropriate language), but I enjoyed the challenge and the final product, and though 'hey, I'll try something like this again'. But life dictated that I wouldn't have another chance to touch my rings for a year.
For this year's GenCon I decided I was going to take several chainmaille classes, as I had finished school and had more free time to take up a hobby. Since a good D20-playing nerd can never have too many bags of dice, I chose to create a rubber/metal ring dicebag, and then to try something more 'wearable' I picked the 'Create a Chainmaille Ring' class. My husband was rooting for the 'Chainmaille Bikini' class, but I (naively) thought that if I didn't finish the project at GenCon I might never finish, and that is a mega-project. The dicebag was a straight-forward project, European 4-1 weave with aluminum, black, and yellow rubber rings. I was able to finish it within the time-frame of the class, which was what I was looking for.
Then...there was the ring...my first venture into the wonderful world of micro-mailling... My previous 2 projects had used fairly standard (larger) size rings, but that was not an option for something that had to be very flexible to be worn on a finger. So the rings used in this project were less than 4 mm across, which you can't truly appreciate until you try to hold them in a pair of pliers and match the ends of the openings up exactly. It took me 4 hours to put this little ring together, and there were (almost) some tears involved. But in the end, I had the first piece that I could wear and show to people without having to explain why on earth I needed a specific bag for dice... Since the ring (mis)adventure, I've worked with many jump rings as small or smaller than what was used in this project, but at the time all I could think was, 'what kind of crazy person does this by choice'.
That was around 3 months ago, and since then I have taken over the desk in our spare bedroom (with dreams of a desk in my reptile room (long story on that room), have multiple containers of rings of all sizes and colors, and a dedicated album of photos on my Facebook page showing my latest jewelry creation. As my husband would say, 'this escalated quickly...'.
I can't even remember now what I wandered into Hobby Lobby looking for that fateful day (picture frames, I think...), when I saw the book CHAINED by Rebeca Mojica (founder/owner of Blue Buddha Botique, )on the shelf. I'll admit it, flipping through I got caught up in my 'I like shiny things' personality, and a purchase was made. And the rest, as they say, is history. I'll talk about projects I've worked on in future posts, but suffice to say since that first pattern book purchase, I have made many earrings, pendants, necklaces, bracelets, etc., and have added countless jump rings and many more patterns to my collection. I've had people try to ply me with alcohol to talk me out of my current accessory, I've had many late nights thinking 'just a few more minutes and this project is done', and I've loved every minute of it. Who would have thought something so potentially frustrating could also be so fulfilling? Now, if I could just learn to control the swearing...
My husband and I, along with a group of friends, have traveled to GenCon every year for quite some time now. If you are at all into gaming (card games, board games, computer games, role-playing games, console games, etc.), you may have heard of GenCon. It is THE place to be if you want to experience 24-hours straight of gaming goodness while also allowing the release of that inner nerd we all have buried deep inside us. They have discussion panels, thousands of different games, hundreds of vendors, and a nice variety of crafting classes. Many of these are of the 'build your own foam weapon or leather breastplate' variety, but several years ago Kathy decided to take a class focused on making a chainmaille dicebag. Every good gaming nerd must have a trusty dicebag to keep those 3-sided, 6-sided, 8-sided, etc., etc., etc., dice in, after all. Eventually Kathy had created several dicebags as well as a lanyard to wear her GenCon badge in style. I loved what she had done, so the next year I decided to take a class as well, but (being a glutton for punishment and just a smidge competitive) I decided to 'take it up a notch'. Chainmaille dicebag (pffft), I decided to go straight to scalemaille.

Scalemaille could be considered the angry big brother of chainmaille. You don't just weave the rings, but you also attach metal scales to the rings themselves. My bag wasn't pretty (being that it was all in unanodized (plain) aluminum), but to this day it gets many oohhhs and ahhhs from people when I place it on the table. Plus, I figure it doubles as a weapon since you could really leave a mark if you decided to wack someone with it! Making this bag involved many hours of time (and more than a little inappropriate language), but I enjoyed the challenge and the final product, and though 'hey, I'll try something like this again'. But life dictated that I wouldn't have another chance to touch my rings for a year.
For this year's GenCon I decided I was going to take several chainmaille classes, as I had finished school and had more free time to take up a hobby. Since a good D20-playing nerd can never have too many bags of dice, I chose to create a rubber/metal ring dicebag, and then to try something more 'wearable' I picked the 'Create a Chainmaille Ring' class. My husband was rooting for the 'Chainmaille Bikini' class, but I (naively) thought that if I didn't finish the project at GenCon I might never finish, and that is a mega-project. The dicebag was a straight-forward project, European 4-1 weave with aluminum, black, and yellow rubber rings. I was able to finish it within the time-frame of the class, which was what I was looking for.
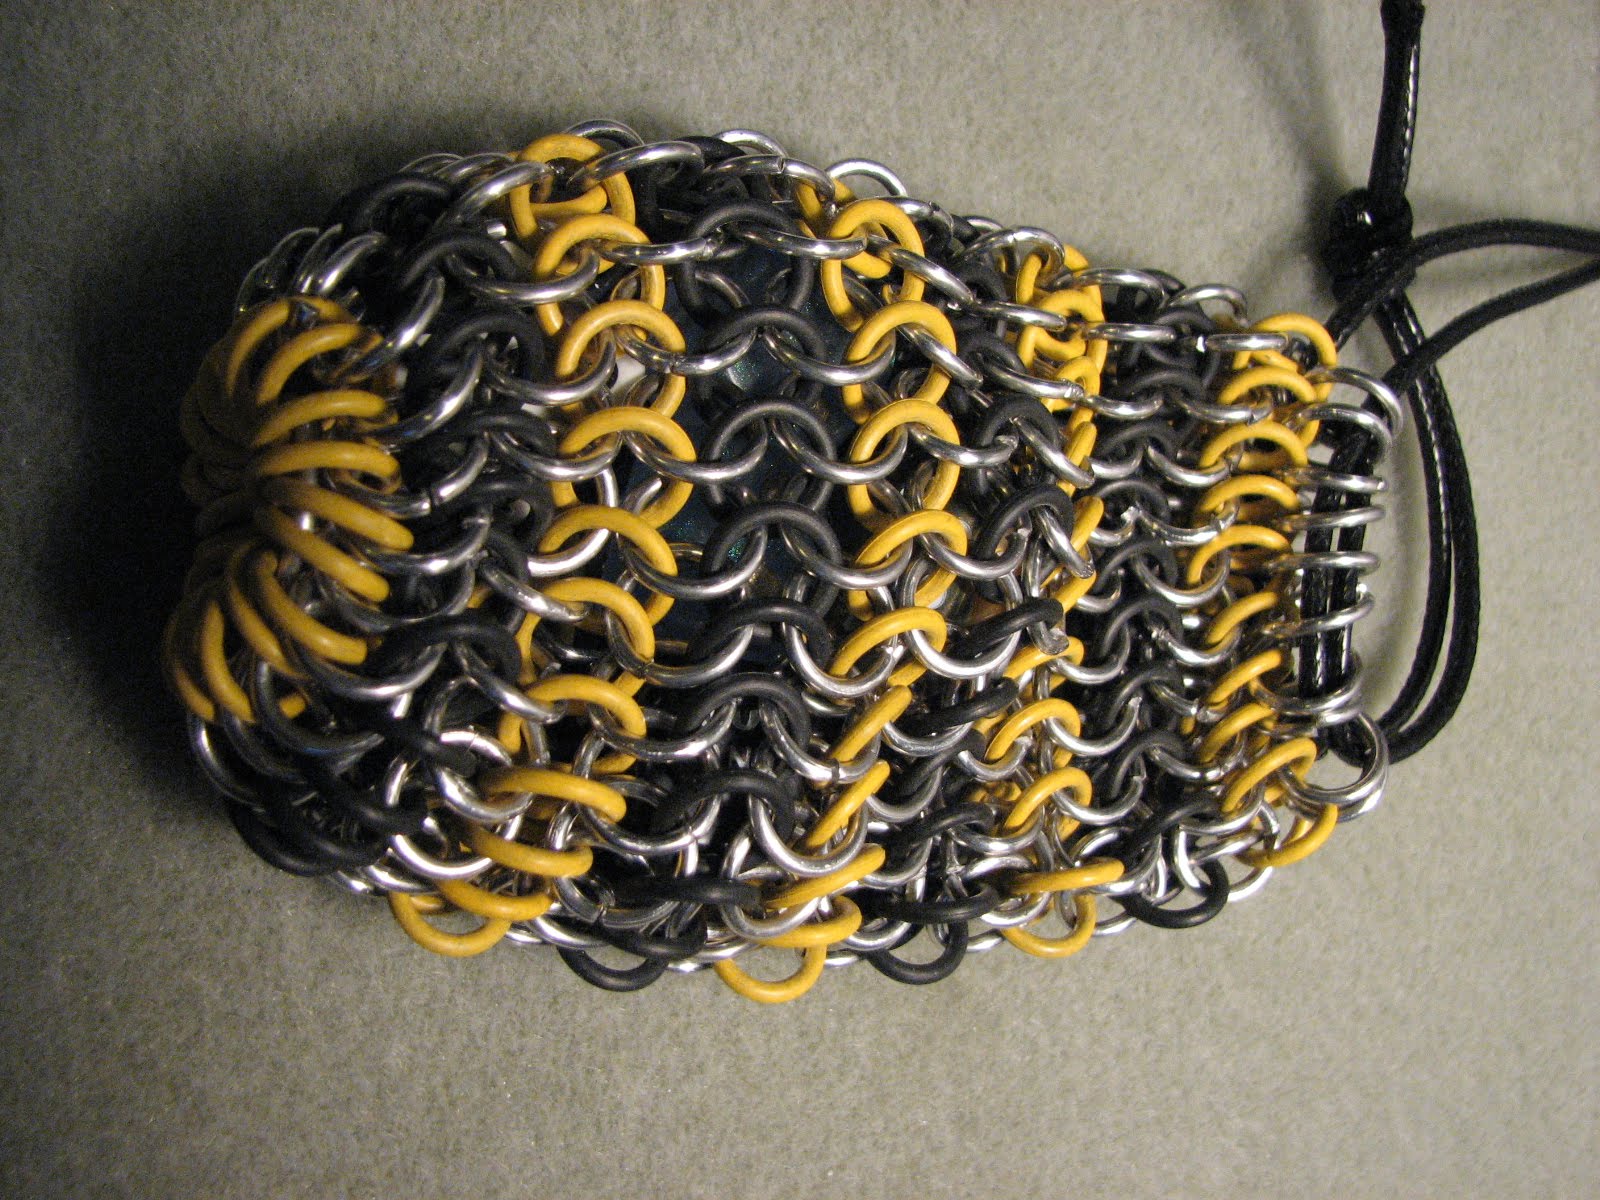
Then...there was the ring...my first venture into the wonderful world of micro-mailling... My previous 2 projects had used fairly standard (larger) size rings, but that was not an option for something that had to be very flexible to be worn on a finger. So the rings used in this project were less than 4 mm across, which you can't truly appreciate until you try to hold them in a pair of pliers and match the ends of the openings up exactly. It took me 4 hours to put this little ring together, and there were (almost) some tears involved. But in the end, I had the first piece that I could wear and show to people without having to explain why on earth I needed a specific bag for dice... Since the ring (mis)adventure, I've worked with many jump rings as small or smaller than what was used in this project, but at the time all I could think was, 'what kind of crazy person does this by choice'.

That was around 3 months ago, and since then I have taken over the desk in our spare bedroom (with dreams of a desk in my reptile room (long story on that room), have multiple containers of rings of all sizes and colors, and a dedicated album of photos on my Facebook page showing my latest jewelry creation. As my husband would say, 'this escalated quickly...'.
I can't even remember now what I wandered into Hobby Lobby looking for that fateful day (picture frames, I think...), when I saw the book CHAINED by Rebeca Mojica (founder/owner of Blue Buddha Botique, )on the shelf. I'll admit it, flipping through I got caught up in my 'I like shiny things' personality, and a purchase was made. And the rest, as they say, is history. I'll talk about projects I've worked on in future posts, but suffice to say since that first pattern book purchase, I have made many earrings, pendants, necklaces, bracelets, etc., and have added countless jump rings and many more patterns to my collection. I've had people try to ply me with alcohol to talk me out of my current accessory, I've had many late nights thinking 'just a few more minutes and this project is done', and I've loved every minute of it. Who would have thought something so potentially frustrating could also be so fulfilling? Now, if I could just learn to control the swearing...
Subscribe to:
Posts (Atom)